DropzoneJs + PHP: How to display existing files on server
- DropzoneJs + PHP: How to build a file upload form
- DropzoneJs + PHP: How to display existing files on server
- DropzoneJS + PHP: The complete guide
In this tutorial, we will show you how to display existing files on the server when using DropzoneJs and PHP. This tutorial is based on How to build a file upload form using DropzoneJs and PHP. Make sure you have read it before proceeding to content in this tutorial.
Preparation
In previous tutorial. We have already set up a proper working DropzoneJs upload form. There is no additional file needed for this tutorial. What we need to do is to make some modifications to file below:
- upload.php
- index.php
Let us get started!
Modify upload.php
In previous tutorial. All upload.php does is to store uploaded files to the server directory "uploads". So we need to add a piece of code to retrieve stored files' information (name and size), and return it in JSON format.
Copy the content below to upload.php. Line 16 to 33 is what we added. And we will explain it in details.
<?php
$ds          = DIRECTORY_SEPARATOR;

$storeFolder = 'uploads';

if (!empty($_FILES)) {

    $tempFile = $_FILES['file']['tmp_name'];

    $targetPath = dirname( __FILE__ ) . $ds. $storeFolder . $ds;

    $targetFile =  $targetPath. $_FILES['file']['name'];

    move_uploaded_file($tempFile,$targetFile);

} else {
    $result  = array();

    $files = scandir($storeFolder);                 //1
    if ( false!==$files ) {
        foreach ( $files as $file ) {
            if ( '.'!=$file && '..'!=$file) {       //2
                $obj['name'] = $file;
                $obj['size'] = filesize($storeFolder.$ds.$file);
                $result[] = $obj;
            }
        }
    }

    header('Content-type: text/json');              //3
    header('Content-type: application/json');
    echo json_encode($result);
}
?>
As you can see, we added an additional "else" statement, when the HTTP Request does not contain files. This is used to detect already stored files on server for our need. Let us see what they actually do.
- Scan "uploads" folder using PHP scandir function. This function returns FALSE if there is any error. And it will return Array of files' names when it is successful.
- Loop through the returned value from scandir function and keep them in $result variable. Keep note, we ignore "." and ".." since scandir will always return "." and ".." as valid content referring to current and previous directory.
- Output proper header for JSON content and also encode PHP Array to JSON string using json_encode function.
Modify index.php
Copy content below to index.php. We will go through modifications individually.
<html>

<head>

<link href="css/dropzone.css" type="text/css" rel="stylesheet" />

<!-- 1 -->
<script src="//ajax.googleapis.com/ajax/libs/jquery/1.10.2/jquery.min.js"></script>

<script src="dropzone.min.js"></script>

<script>
<!-- 3 -->
Dropzone.options.myDropzone = {
    init: function() {
        thisDropzone = this;
        <!-- 4 -->
        $.get('upload.php', function(data) {

            <!-- 5 -->
            $.each(data, function(key,value){

                var mockFile = { name: value.name, size: value.size };

                thisDropzone.options.addedfile.call(thisDropzone, mockFile);

                thisDropzone.options.thumbnail.call(thisDropzone, mockFile, "uploads/"+value.name);

            });

        });
    }
};
</script>

</head>

<body>

<!-- 2 -->
<form action="upload.php" class="dropzone" id="my-dropzone"></form>

</body>

</html>
- We added Jquery library into our page. This actually not for DropzoneJs directly. We are using Jquery's ajax function $.get only. You will see below
- We added an ID element (my-dropzone) to the form. This is needed because we need to pass configuration values to Dropzone. And to do it, we must have an ID reference of it. So that we can configure it by assigning values to Dropzone.options.myDropzone. A lot of people face confusion when configuring Dropzone. To put it in a simple way. Do not take Dropzone as a Jquery plugin, it has its own syntax and you need to follow it.
- This starts the main part of modification. What we did here is to pass a function to listen to Dropzone's init event. This event is called when Dropzone is initialized.
- Retrieve files details from "upload.php" via ajax.
- Create mockFile using values from server. mockFile is simply JavaScript objects with properties of name and size. Then we call Dropzone's addedfile and thumbnail functions explicitly to put existing files to Dropzone upload area and generate its thumbnail.
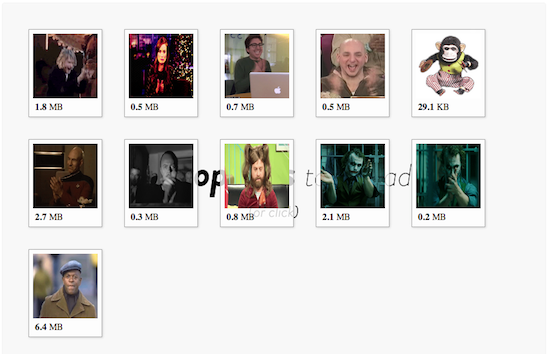
If you have done it successfully. Now go and upload some images and reload the upload page. Already uploaded files should auto display in Dropzone area.
The end
Hopefully this simple tutorial helped you with your development. If you like our post, please follow us on Twitter and help spread the word. We need your support to continue. If you have questions or find our mistakes in above tutorial, do leave a comment below to let us know.