 Server, Database, Application and Laravel Backups - Get fully protected with SnapShooter
SSH Basics Part 2: Login to cloud server
This is part 2 of SSH Basics. In this tutorial we will show you how to login to cloud server using SSH.
How it works
When you purchase a cloud server from cloud hosting provider. What you get is web admin access to its admin panel. You will be able to choose what OS for the server and shutdown/restart the server. But you will not be able to do things related to the server itself.
Here is where SSH comes in. You will need to set up SSH access correctly, so that you are able to login to the cloud server from your local machine and do some server stuff. For example, installing web server, deploy application source code and so on.
The basic idea in this case is that:
- Generate a public/private key pair on your local machine.
- Copy the public key to the cloud server. Typically the hosting provider will have a section on their admin panel for you to do this.
Generate public/private keys pair
As mentioned earlier, first step is to generate a pair of public/private keys. If you are interested in knowing more about public/private keys and how they work together, we encourage that you read the article at http://www.unixwiz.net/techtips/ssh-agent-forwarding.html. But for now, let's pretend we know the concept behind.
To generate public/private keys pair, run command below on your local machine. In this tutorial, we are running Mac OS X, so we will do this from Terminal.
ssh-keygen -t rsa
the -t option allow us to specify the type of key to create. Normally we will use rsa (more about rsa at http://en.wikipedia.org/wiki/RSA_%28cryptosystem%29)
Enter file in which to save the key (/Users/demo/.ssh/id_rsa):
Enter the path where you want to store the public/private keys pair. On Max OS X, we normally save them to users home directory. Keep it as the default value if you are running it first time.
Enter passphrase (empty for no passphrase):
Key in a password to protected your private key. You will need to enter this password each time you access the private key. Keep it empty if you do not want a password.
Enter same passphrase again:
Confirm your password.
Your identification has been saved in /Users/demo/.ssh/id_rsa.
Your public key has been saved in /Users/demo/.ssh/id_rsa.pub.
The key fingerprint is:
b8:76:83:77:be:d9:b2:b7:73:33:8d:07:da:52:3f:0a
The key's randomart image is:
+--[ RSA 2048]----+
|                 |
|                 |
|                 |
|       .         |
|      . S        |
|       o      o  |
|      + + .E + = |
|     . o +.o* *.+|
|          ==o*.+.|
+-----------------+
You have successfully generated the pair if you see the message above. Public key is saved to /Users/demo/.ssh/id_rsa.pub and private key is saved to /Users/demo/.ssh/id_rsa.
Store public key to cloud server
Now we need to store the public key to the cloud server you have purchased. Most cloud servers providers have an admin section for you to upload the public key.
In this tutorial, we are using Digital Ocean as an example (Digital Ocean is generous enough to give readers on our site $10 in credit if you sign up via this link.
Login to Digital Ocean's web admin panel, click Your Settings, and select Security section. You will see a panel called SSH Keys as below:
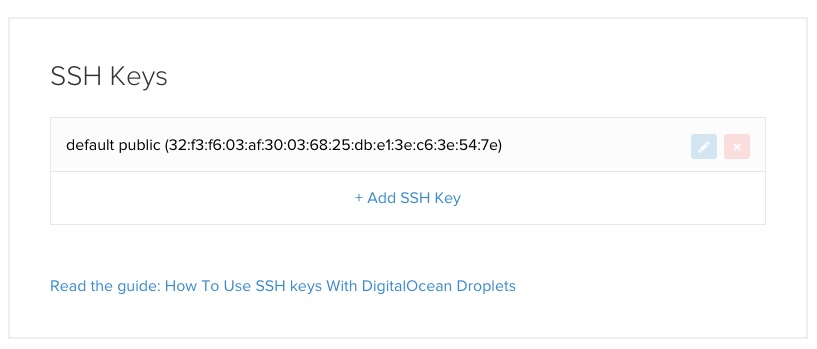
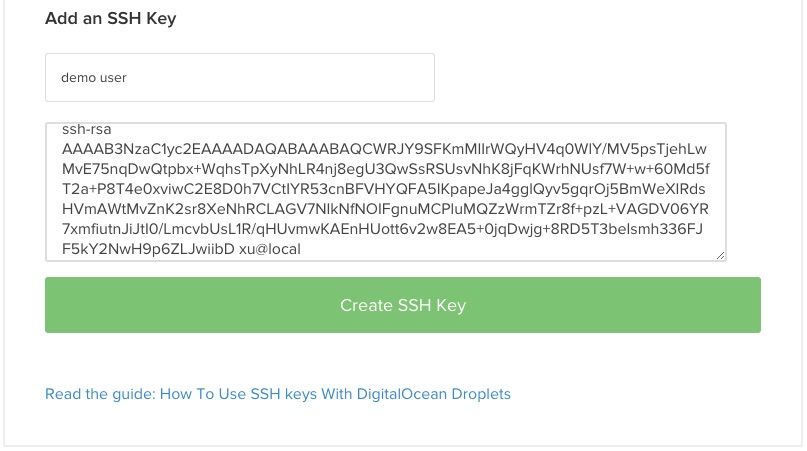
Click Add SSH Key. Copy the content of the public key (/Users/demo/.ssh/id_rsa.pub) from your local machine.
cat /Users/demo/.ssh/id_rsa.pub
And paste it to the form:
Login to server
Now we should be able to login to the cloud server using SSH. Simply type
ssh root@ip-address-of-your-server
If you have supplied a passphase when generating the keys pair, it will prompt to key in the password. Otherwise you should be able to access your cloud server from the command line.
The end
Next tutorial, we will explain some very useful commands when we SSH to any Linux servers.
Hopefully this simple tutorial helped you with your development. If you like our post, please follow us on Twitter and help spread the word. We need your support to continue. If you have questions or find our mistakes in above tutorial, do leave a comment below to let us know.