PHP CRUD Tutorial (part 2)
- PHP CRUD Tutorial (part 1)
- PHP CRUD Tutorial (part 2)
- PHP CRUD Tutorial (part 3)
- Advanced PHP CRUD Tutorial
In this part of tutorial, we are going to create "Create" and "Read" pages of PHP CRUD grid.
Adding "Create" button and "Read" button
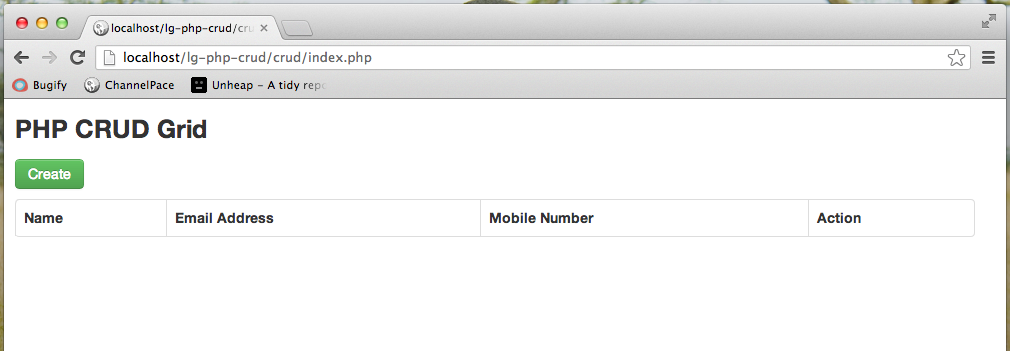
To start, we firstly need a navigation button which leads to "Create" page and also a button to read a record. Open "index.php" file we created in part 1 of this tutorial. And add a "Create" button at the top of the table, and also "Read" buttons for each row of the table.
Now the "index.php" file's code should look like below, the highlighted codes are what we have added:
<!DOCTYPE html>
<html lang="en">
<head>
    <meta charset="utf-8">
    <link   href="css/bootstrap.min.css" rel="stylesheet">
    <script src="js/bootstrap.min.js"></script>
</head>

<body>
    <div class="container">
            <div class="row">
                <h3>PHP CRUD Grid</h3>
            </div>
            <div class="row">
                <p>
                    <a href="create.php" class="btn btn-success">Create</a>
                </p>
                <table class="table table-striped table-bordered">
                      <thead>
                        <tr>
                          <th>Name</th>
                          <th>Email Address</th>
                          <th>Mobile Number</th>
                          <th>Action</th>
                        </tr>
                      </thead>
                      <tbody>
                      <?php
                       include 'database.php';
                       $pdo = Database::connect();
                       $sql = 'SELECT * FROM customers ORDER BY id DESC';
                       foreach ($pdo->query($sql) as $row) {
                                echo '<tr>';
                                echo '<td>'. $row['name'] . '</td>';
                                echo '<td>'. $row['email'] . '</td>';
                                echo '<td>'. $row['mobile'] . '</td>';
                                echo '<td><a class="btn" href="read.php?id='.$row['id'].'">Read</a></td>';
                                echo '</tr>';
                       }
                       Database::disconnect();
                      ?>
                      </tbody>
                </table>
        </div>
    </div> <!-- /container -->
  </body>
</html>
Now if you navigate to "index.php page". You should notice a "Create" button. However since its linked page is not created, it will redirect to an error page if you click the button. We will fix that next step:
Creating a "Create" page
Create a PHP file "create.php"; This file contains an html form and it is the "Create" part of CRUD grid.
We will go through this file as two parts.
First part of the codes is an html form. It is pretty straightforward; all it does is to create an html form. As we need to provide validation for form entries. Hence there is a PHP variable for holding validation error for each field. Copy the code below to "create.php" file:
<!DOCTYPE html>
<html lang="en">
<head>
    <meta charset="utf-8">
    <link   href="css/bootstrap.min.css" rel="stylesheet">
    <script src="js/bootstrap.min.js"></script>
</head>

<body>
    <div class="container">

                <div class="span10 offset1">
                    <div class="row">
                        <h3>Create a Customer</h3>
                    </div>

                    <form class="form-horizontal" action="create.php" method="post">
                      <div class="control-group <?php echo !empty($nameError)?'error':'';?>">
                        <label class="control-label">Name</label>
                        <div class="controls">
                            <input name="name" type="text"  placeholder="Name" value="<?php echo !empty($name)?$name:'';?>">
                            <?php if (!empty($nameError)): ?>
                                <span class="help-inline"><?php echo $nameError;?></span>
                            <?php endif; ?>
                        </div>
                      </div>
                      <div class="control-group <?php echo !empty($emailError)?'error':'';?>">
                        <label class="control-label">Email Address</label>
                        <div class="controls">
                            <input name="email" type="text" placeholder="Email Address" value="<?php echo !empty($email)?$email:'';?>">
                            <?php if (!empty($emailError)): ?>
                                <span class="help-inline"><?php echo $emailError;?></span>
                            <?php endif;?>
                        </div>
                      </div>
                      <div class="control-group <?php echo !empty($mobileError)?'error':'';?>">
                        <label class="control-label">Mobile Number</label>
                        <div class="controls">
                            <input name="mobile" type="text"  placeholder="Mobile Number" value="<?php echo !empty($mobile)?$mobile:'';?>">
                            <?php if (!empty($mobileError)): ?>
                                <span class="help-inline"><?php echo $mobileError;?></span>
                            <?php endif;?>
                        </div>
                      </div>
                      <div class="form-actions">
                          <button type="submit" class="btn btn-success">Create</button>
                          <a class="btn" href="index.php">Back</a>
                        </div>
                    </form>
                </div>

    </div> <!-- /container -->
  </body>
</html>
Second part of the codes is where the magic happens. It handles record creation process. Copy the codes below to the beginning of "create.php" file, we will go through them afterwards:
<?php

    require 'database.php';

    if ( !empty($_POST)) {
        // keep track validation errors
        $nameError = null;
        $emailError = null;
        $mobileError = null;

        // keep track post values
        $name = $_POST['name'];
        $email = $_POST['email'];
        $mobile = $_POST['mobile'];

        // validate input
        $valid = true;
        if (empty($name)) {
            $nameError = 'Please enter Name';
            $valid = false;
        }

        if (empty($email)) {
            $emailError = 'Please enter Email Address';
            $valid = false;
        } else if ( !filter_var($email,FILTER_VALIDATE_EMAIL) ) {
            $emailError = 'Please enter a valid Email Address';
            $valid = false;
        }

        if (empty($mobile)) {
            $mobileError = 'Please enter Mobile Number';
            $valid = false;
        }

        // insert data
        if ($valid) {
            $pdo = Database::connect();
            $pdo->setAttribute(PDO::ATTR_ERRMODE, PDO::ERRMODE_EXCEPTION);
            $sql = "INSERT INTO customers (name,email,mobile) values(?, ?, ?)";
            $q = $pdo->prepare($sql);
            $q->execute(array($name,$email,$mobile));
            Database::disconnect();
            header("Location: index.php");
        }
    }
?>
As you see, firstly we check if there is form submit by checking $_POST variable. If so, we check each entries to ensure they are not empty. Additionally for email address entry, we use PHP filter to verify if it is a valid email address. Then if it passes all validation rules, it inserts data to database using Database class. At last it will redirect to "index.php" using PHP header() function. However if there is any validation error, the validation variables will be showed in the form.
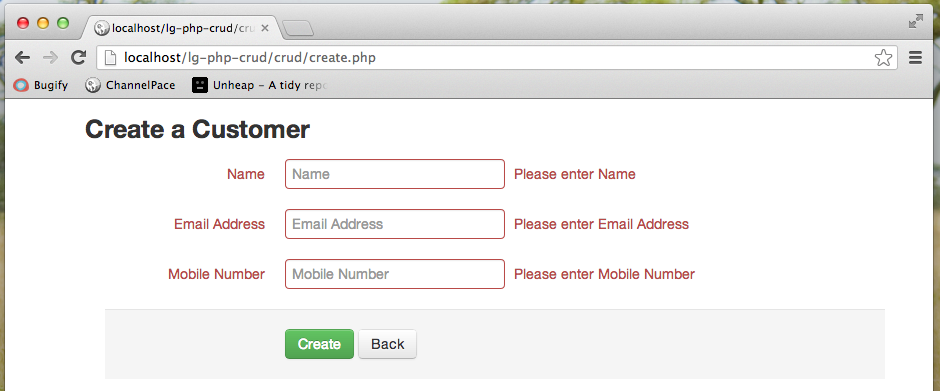
If you have followed correctly. Navigate to "create.php" page, and click on the "Create" button, you should be able to see a PHP form with validation errors as below:
Create some records by entering correct customer information. You should be able to see a CRUD grid as below.
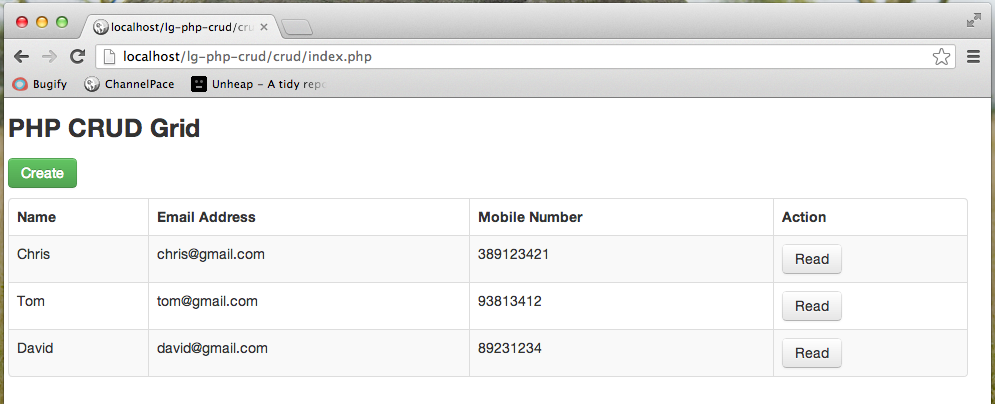
You must have noticed a "Read" button for each row. That is what we have added in step 1 of this tutorial. If you click it now, it will lead you to an error page. And that is what we are going to create next step.
Creating a "Read" page
Create a PHP file "read.php"; this file is the "Read" part of CRUD grid. Comparing to "Create" part, this step is pretty straightforward. Copy codes below to the file and we will explain afterwards.
<?php
    require 'database.php';
    $id = null;
    if ( !empty($_GET['id'])) {
        $id = $_REQUEST['id'];
    }

    if ( null==$id ) {
        header("Location: index.php");
    } else {
        $pdo = Database::connect();
        $pdo->setAttribute(PDO::ATTR_ERRMODE, PDO::ERRMODE_EXCEPTION);
        $sql = "SELECT * FROM customers where id = ?";
        $q = $pdo->prepare($sql);
        $q->execute(array($id));
        $data = $q->fetch(PDO::FETCH_ASSOC);
        Database::disconnect();
    }
?>

<!DOCTYPE html>
<html lang="en">
<head>
    <meta charset="utf-8">
    <link   href="css/bootstrap.min.css" rel="stylesheet">
    <script src="js/bootstrap.min.js"></script>
</head>

<body>
    <div class="container">

                <div class="span10 offset1">
                    <div class="row">
                        <h3>Read a Customer</h3>
                    </div>

                    <div class="form-horizontal" >
                      <div class="control-group">
                        <label class="control-label">Name</label>
                        <div class="controls">
                            <label class="checkbox">
                                <?php echo $data['name'];?>
                            </label>
                        </div>
                      </div>
                      <div class="control-group">
                        <label class="control-label">Email Address</label>
                        <div class="controls">
                            <label class="checkbox">
                                <?php echo $data['email'];?>
                            </label>
                        </div>
                      </div>
                      <div class="control-group">
                        <label class="control-label">Mobile Number</label>
                        <div class="controls">
                            <label class="checkbox">
                                <?php echo $data['mobile'];?>
                            </label>
                        </div>
                      </div>
                        <div class="form-actions">
                          <a class="btn" href="index.php">Back</a>
                       </div>


                    </div>
                </div>

    </div> <!-- /container -->
  </body>
</html>
Firstly let us look at the beginning part of the PHP codes. What it does is that, it tries to allocate a $_GET['id'] variable. If it is not found, it redirects to "index.php" page. Otherwise, it will read data from database using the "id" field and store data into a PHP variable $data.
Next part, which is the static html part, is pretty simple. It prints out the $data variable.
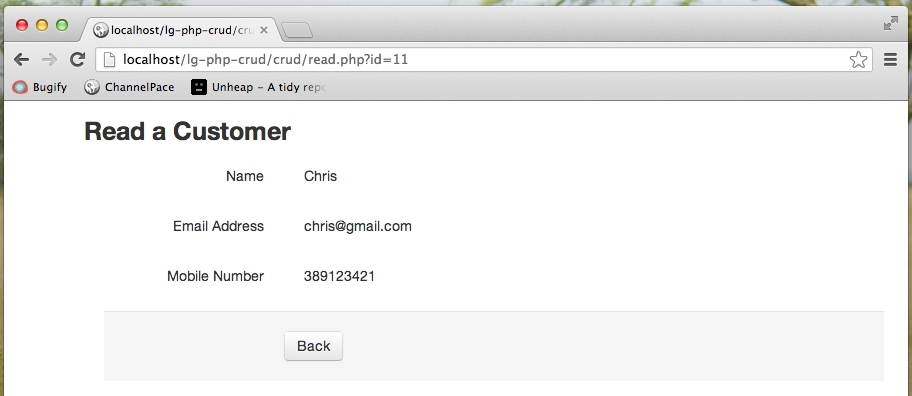
If you get it working. "read.php" page should look like below:
To be continued
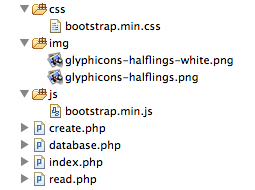
If you have followed along correctly. You should have some files as below:
In next tutorial (PHP CRUD tutorial part 3), We are going to create the "Update" and "Delete" pages of PHP CRUD grid. Make sure you bookmark this page and come back to visit us next week. We will provide source code package at the last part of this series of tutorial as well. And also if you enjoy this tutorial, please share them using the share buttons on left side of the post.
Hopefully this simple tutorial helped you with your development. If you like our post, please follow us on Twitter and help spread the word. We need your support to continue. If you have questions or find our mistakes in above tutorial, do leave a comment below to let us know.